Product Photography Basics for Brands
Product photography is the most learnable photography there is: the subject does not move, you control the light, and you can reshoot until it is right. Get the fundamentals down — clean light, a clean background, and two reliable angles — and you can produce e-commerce and brand imagery that looks professional without a studio. This guide covers the gear, the lighting, the angles, and the edits that matter.
For where product work fits in the bigger picture, see our guide to photography for designers. Now let’s get shooting.
The Gear You Actually Need
You need far less than you think. A modern phone camera, used well, beats a DSLR used badly. The real essentials:
- A camera: a recent smartphone is fine to start; a mirrorless or DSLR gives more control later.
- A tripod: non-negotiable. It eliminates shake, keeps framing consistent across a set, and lets you use low ISO for clean images.
- A light source: a large window or an affordable softbox/LED panel.
- A diffuser: a sheer curtain, white sheet, or the panel built into a lightbox to soften the light.
- A clean background: seamless white paper, a roll of craft paper, or a lightbox (light tent) for small items.
- A reflector: a white card or foam board to bounce light back into shadows.
That foam-board reflector is the cheapest upgrade in photography — it fills harsh shadows for almost nothing and instantly makes shots look more polished.
Lighting: Soft vs Hard Light
Lighting is the single biggest factor in product photography, and the core concept is soft vs hard light.
Soft light comes from a large, diffused source — a big window, a softbox, or a lightbox panel. It wraps around the product, produces gentle gradients, and minimizes harsh shadows. For the vast majority of catalog and e-commerce shots, soft light is what you want, because it is flattering and shows the product clearly.
Hard light comes from a small, direct source like bare sun or an undiffused bulb. It creates crisp, defined shadows and high contrast — dramatic and great for emphasizing texture or edges, but risky for clean product shots because the shadows can dominate.
The simplest reliable setup is diffused window light: place the product beside a large window, hang a sheer curtain to soften it, and use a white card on the opposite side to fill the shadows. One good light source plus one reflector covers most products.
Backgrounds and Surfaces
A clean background keeps attention on the product and makes editing easier:
- Seamless white: the e-commerce standard, ideal for marketplace listings that require a pure white backdrop.
- Neutral textures: wood, stone, linen, or marble add warmth and lifestyle context for brand and social shots.
- Brand color: a solid backdrop in a brand hue creates striking, on-brand imagery.
For small products, a lightbox gives you a seamless white background and diffused light in one cheap package. For larger items, a sweep of seamless paper curving from wall to floor removes the horizon line and produces that floating, infinite-white look.
The Two Core Angles
Almost every product shot uses one of two angles, and learning both covers most briefs.
| Angle | What it shows | Best for |
|---|---|---|
| 45-degree | Form, depth, and dimension as the eye naturally sees a product | Hero shots, packaging, bottles, gadgets |
| Flat-lay (90°) | Top-down arrangement of items on a surface | Apparel, stationery, food, multi-item sets |
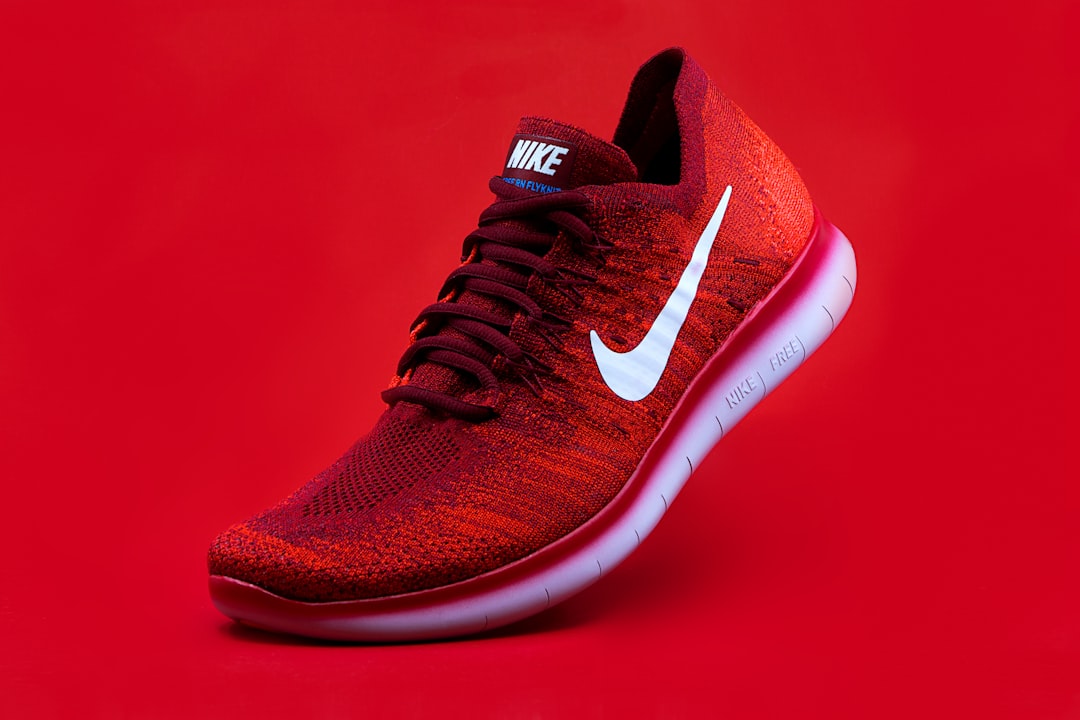
The 45-degree angle is the workhorse hero shot: it reveals the front, the top, and a sense of depth all at once, the way you would naturally look at an object on a table. The flat-lay shoots straight down and excels at arrangements — flat goods, apparel, and styled collections — where composition becomes a small layout exercise you already know how to do.
A Simple Step-by-Step Setup
- Position the product on your background, near a large window or softbox.
- Diffuse the light with a curtain or panel so shadows go soft.
- Add a reflector opposite the light to fill the shadow side.
- Mount the camera on a tripod and frame at a 45-degree angle (or directly overhead for a flat-lay).
- Lock settings: low ISO for cleanliness, a mid aperture (around f/8) for sharpness across the product, and correct white balance.
- Shoot, review at full size, adjust, and reshoot. The freedom to reshoot is product photography’s biggest advantage.
Apply the composition rules every designer should know here too — leave negative space for copy, and use the rule of thirds for lifestyle and flat-lay arrangements.
Editing Product Photos
Even a good shot needs a clean edit before it is ready for a store:
- Correct white balance first so whites are truly white and colors are accurate — critical when the product color must match reality.
- Clean the background by removing dust, smudges, and stray shadows.
- Adjust exposure and contrast for a bright, crisp result.
- Maintain consistency across the whole catalog so every product looks like part of one set.
Color accuracy is where product work lives or dies — a mug photographed as the wrong shade leads to returns and complaints. Build one consistent treatment and apply it across the range; our color grading guide for beginners shows how to keep an entire catalog cohesive.
Common Mistakes to Avoid
- Hard, undiffused light that throws ugly shadows across the product.
- Cluttered or distracting backgrounds that pull focus from the item.
- Shooting handheld, causing soft, inconsistent images across a set.
- Wrong white balance, misrepresenting the product’s true color.
- Inconsistent angles and crops that make a catalog look thrown together.
Fix these five and your product photography will already look a tier above most small-brand imagery — clean light, clean background, consistent angles, accurate color.
Frequently Asked Questions
What equipment do I need for product photography?
The essentials are a camera (a modern smartphone works), a tripod, a soft light source like a window or softbox, a diffuser, a clean background or lightbox, and a white reflector. A tripod and a reflector are the two cheapest, highest-impact items for consistent, polished results.
What is the best lighting for product photography?
Soft, diffused light is best for most products because it wraps around the item and minimizes harsh shadows. The simplest reliable setup is a large window with a sheer curtain to diffuse it, plus a white card opposite to fill the shadows. Reserve hard light for dramatic texture shots.
What angles work best for product photos?
Two angles cover most needs. The 45-degree hero angle shows form, top, and depth the way the eye naturally sees an object, ideal for packaging and gadgets. The flat-lay shoots straight down, perfect for apparel, stationery, and styled multi-item arrangements.
Can I shoot good product photos with a phone?
Yes. A recent smartphone on a tripod, with soft diffused light, a clean background, and careful editing, produces professional-looking results. Technique matters more than gear, soft light and consistent setup beat an expensive camera used badly. Lock focus and exposure, and reshoot until it is right.
How do I keep product photos color-accurate?
Set correct white balance when shooting and correct it again in editing so whites are neutral. Use consistent lighting across the whole catalog, and grade every product with the same treatment. Accurate color matters most for products where the real shade must match what customers receive.