Coloring Book Design: How to Make One
Good coloring book design comes down to a few unglamorous technical choices: clean line art, pages laid out single-sided so markers don’t bleed through, and a file set up correctly for print. Get those right and the rest is creativity. This guide walks through the whole process, from line weight to KDP upload.
Coloring books sit in the children’s-publishing family alongside narrative titles. If you are building a broader catalog, our pillar on children’s book illustration covers the art fundamentals, and the activity book design guide pairs well when you want puzzles alongside coloring pages.
The Two Rules That Define a Coloring Book
Two production decisions separate a usable coloring book from a frustrating one.
- Single-sided pages. Print line art on one side of each sheet and leave the back blank. Crayons and especially markers bleed through thin paper, ruining the image behind. Single-sided pages mean a child can color any page without wrecking another.
- Thick, clean outlines. Use bold black outlines — roughly 3–5 pt and consistent — so the lines stay visible after coloring and the regions are easy to fill. Thin, sketchy lines vanish under crayon and frustrate young hands.
Everything else — themes, complexity, trim size — flexes with your audience. These two rules do not.
Line Art: Weight, Contrast, and Region Size
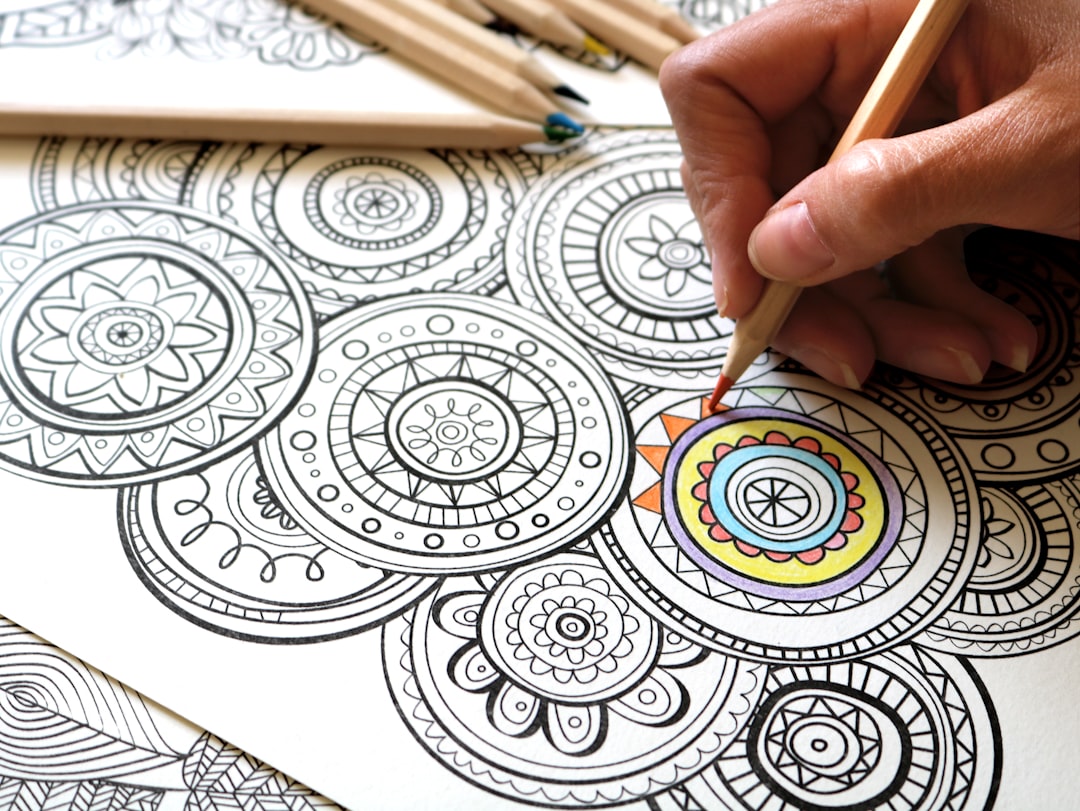
Coloring pages are pure line art: solid black outlines on white, with no shading or gray fills. Build them so the regions are inviting to color.
- Line weight: bold and even. Aim for thick, closed outlines that won’t disappear under crayon.
- Region size: match the audience. Toddlers need large, simple shapes; older kids and adults enjoy finer, more intricate areas.
- Closed shapes: make sure outlines fully enclose each region so a child knows where to stop.
- Pure black and white: no anti-aliased gray edges in the final export — line art should be crisp 1-bit-style black on white for the cleanest print.
You can draw line art in Procreate or Photoshop with a hard inking brush, or build crisp scalable outlines in Illustrator or Affinity Designer. Vector outlines have the advantage of staying razor-sharp at any size.
Trim Size and Page Setup
The most popular coloring-book size on KDP is letter-size, 8.5 × 11 in, which gives kids and adults plenty of room. Square 8.5 × 8.5 in is also common for children’s titles.
| Trim size | Best for |
|---|---|
| 8.5 × 11 in | The default; roomy pages for all ages |
| 8.5 × 8.5 in | Square children’s coloring books |
| 8 × 10 in | A slightly smaller, economical portrait option |
Set the document at 300 DPI. Line art is pure black and white, so color mode matters less than for full-color books, but keep blacks as solid K100 (or true black) for crisp printing. Build the interior so every coloring image faces a blank back page.
KDP: No-Bleed vs Bleed
Amazon KDP offers two interior options, and the choice shapes how you build pages.
- No-bleed leaves a white margin around every page. The image floats inside a frame, and nothing prints to the edge. This is the easiest and most common setup for coloring books — clean borders, simple file prep.
- Bleed lets art run all the way to the trimmed edge. If you want full-page designs with no border, extend the art about 0.125 in past the trim line on outer edges and keep important detail inside a safe margin.
Either way, give the binding edge a wider inner margin so coloring areas near the spine stay easy to reach and aren’t lost in the gutter.
Step-by-Step: Building Your Coloring Book
- Plan the theme and count. Decide the subject (animals, vehicles, mandalas) and how many pages — commonly 25–50 coloring images.
- Set the document. Create your file at trim size (plus bleed if used) at 300 DPI.
- Create line art. Draw or vector each design with bold, closed outlines on white.
- Lay out single-sided. Place each image with a blank page on its back to prevent bleed-through.
- Add front matter. Title page, a “this book belongs to” page, maybe a test-color swatch page.
- Design the cover. A bright, colored sample of the line art sells the book — see storybook cover design and the broader book cover design guide.
- Export and proof. Output a print-ready PDF and order a physical proof to confirm line crispness and bleed-through.
Matching Complexity to Your Audience
The biggest creative lever in coloring book design is how intricate the line art is, and that should track directly to who’s coloring. A book aimed at the wrong complexity level frustrates instead of delights.
| Audience | Region size | Detail level |
|---|---|---|
| Toddlers (2–4) | Very large | One simple object per page, thick outlines |
| Young kids (5–8) | Medium | Recognizable scenes with a few elements |
| Older kids (9–12) | Smaller | More detailed scenes and patterns |
| Adults / teens | Fine | Intricate mandalas, florals, patterns |
Keep the complexity consistent within a single book so a buyer knows what they’re getting. A coloring book that mixes toddler-simple pages with intricate adult pages confuses everyone. If you want range, publish separate titles for separate age bands.
Themes That Sell
Theme is what makes a browser stop and buy, so pick one with a clear hook rather than a generic grab-bag. Strong, evergreen children’s themes include:
- Animals — perennially popular, from farm animals to dinosaurs to sea creatures.
- Vehicles — trucks, trains, diggers, and rockets for younger kids.
- Seasonal and holiday — Christmas, Halloween, and Easter titles spike each year.
- Fantasy — unicorns, dragons, mermaids, and fairies.
- Everyday worlds — the zoo, the farm, a busy town, the ocean.
A focused theme also helps your title and cover do their job. A bright, colored-in sample of your own line art on the cover signals exactly what’s inside.
Tools for Coloring Book Design
- Procreate — fast inking on iPad with hard brushes; export at 300 DPI.
- Adobe Photoshop — raster inking and clean black-and-white export control.
- Adobe Illustrator or Affinity Designer — crisp vector outlines that scale to any size.
- Adobe InDesign or Affinity Publisher — assembling single-sided pages and exporting the print PDF.
Frequently Asked Questions
Why are coloring book pages printed single-sided?
Crayons and markers bleed through standard book paper, so a colored image would ruin whatever is printed on the back. Printing line art on one side of each sheet and leaving the back blank lets a child color any page freely without damaging another image in the book.
How thick should coloring book outlines be?
Use bold, consistent outlines around 3 to 5 pt, scaled to your audience and page size. Thick, fully closed black lines stay visible after coloring and make each region easy to fill. Thin or sketchy lines disappear under crayon and frustrate young children especially.
What size should a coloring book be?
The most popular KDP size is letter, 8.5 by 11 inches, which gives generous room for coloring. Square 8.5 by 8.5 inches is common for children’s titles, and 8 by 10 inches is an economical portrait option. Set the file at 300 DPI regardless of size.
Should I use bleed or no-bleed for a coloring book?
No-bleed is the easiest and most common choice, framing each design in a clean white margin. Choose bleed only when you want full-page art running to the edge, extending it about 0.125 inch past the trim line. Either way, widen the inner margin near the binding.
What software is best for making a coloring book?
For line art, Procreate or Photoshop work well for raster inking, while Illustrator and Affinity Designer produce crisp vector outlines that scale perfectly. Assemble the single-sided interior and export the print-ready PDF in InDesign or Affinity Publisher, then order a proof before publishing.